[ad name=”new”]
Sometimes spyware gets so bad, it’s hard to do anything. You can’t go online and download Malwarebytes or Spybot or any anti-spyware (see this post), because your browser–that is, your Internet Explorer or Firefox–is hijacked and redirected and won’t let you go anywhere of use and certainly won’t let you download anything. So you take the next step, and reboot your computer into Safe Mode with Networking by tapping F8 as the computer restarts. But sometimes even in Safe Mode, the malware keeps you from downloading anti-spyware or, if you manage to download it, running it. So now you face reformatting your hard drive and losing all your data and the programs, at least the programs you’ve lost your disks to, or never had disks for in the first place.
What do you do now? You take the computer to a tech who nine times out of ten will recommend reformatting. Or you find a tech like Ms. Ducktoes who will fight the malware without reformatting. Ask your tech if he or she will do this. Ask if he will use Malwarebytes or SuperAntispyware.
Or…you can do this.
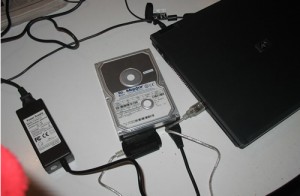
1. Go to the computer store and buy a device that lets your hard drive to another computer by USB. It’s called a USB to IDE/Sata Adapter and costs from $25 to $35 dollars.

2. Find another Windows computer either your own or a friend’s or relative’s. Download and update Malwarebytes and AVG and SuperAntispyware and Spybot to that second computer. (You have many choices, just make sure you use Malwarebytes and AVG among them.)
3. Turn off the power to badly infected computer and unattach the cables. Open up the case of the and remove the hard drive. Some cases will have large buttons to push–like Dell– others will have screws. Remove the case.

Make sure your computer is turned off and unplugged before you do this.
4. The hard drive will have a wide-band white/gray cable attached to it and a four-prong power cable.
5. Remove the cables. (Take a digital photo with your camera or cell phone if you think you may forget how they are attached.

5. You’ll probably have to unscrew the hard drive from the where it is attached to the case.
- Use a screwdriver to unscrew hard drive screws.
6. After removed, attach the hard drive to the right (same size) IDE/SATA adapter and plug in the power.

7. Connect USB cable to the USB port of the second computer.

The computer should recognize that new hardware has been attached. If you go into My Computer, you’ll see it as a USB mass storage device and listed as a letter such as E, F, G, or H, depending on how many cd/dvd and hard drives are on that computer.


Your hard drive is attached!
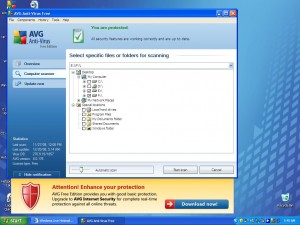
7. Now run the anti-spyware and anti-virus programs one at a time. If you can, do a custom scan and single out the attached hard drive. Let each anti-spyware run and then remove or quarantine the viruses.

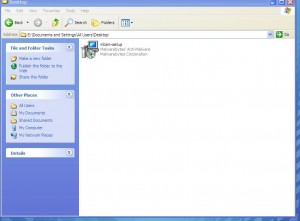
8. If you have enough skill, go into the desktop of that drive (the one that is connected by USB) and copy and paste the Malwarebytes installer to the desktop of your user. Find the All Users desktop folder and drag the MBAM installer icon into the window.

Then you can run it later when you reattach the hard drive in its own computer.
9. Unattach the hard drive from the USB and put it back into its own case. Reattach the cables all the way so they fit snuggly. Start up the computer. You should now be able to go into Safe Mode with Networking and download the anti-spyware and run it. You still will have a lot of spyware to contend with but now you have more of an edge. If you put the Malwarebytes icon (Mbam) on the desktop you can click on it and run it. Make sure that you update it.
Good luck and let Ms. Ducktoes know how it goes. Please feel free to comment and make suggestions.
See this post for more detailed information on how to download and run the anti-spyware.
[ad name=”new”]


7 Responses
thanks dude for this information,great job!!
i already remove malware in my computer use free anti malware.malwarebyte is powerfull freeware program for perfectly remove malware without use your money to buy program.Free tutorial perfectly remove malware use malwarebyte
Have just spotted this article and just wanted to say appreciate your being
so comprehensive on your article
Hi, I would like to subscribe for this weblog to obtain latest updates, therefore where can i do it please help out.|
Ridiculous story there. What occurred after? Good luck!|